Slackline beginner mistakes: why it wobbles at the start
The typical slackline beginner mistakes almost never have to do with talent. When your legs shake and you’re standing next to the line again after two seconds, that’s completely normal – your body is learning a totally new movement pattern. That takes repetition, not courage.
The good news: most pitfalls can be defused immediately with small corrections. In this guide we’ll go through the seven most common mistakes – in the setup, in technique and in sticking with it. For each one I’ll show you the quick fix, so that frustration quickly turns into real progress.
So don’t see the mistakes as setbacks but as signposts. Whoever knows where things snag corrects in a targeted way instead of trying at random. That’s exactly what saves you weeks.
Mistakes in the setup
Before you even put a foot on the line, the setup already decides half the battle. Four points most often go wrong for beginners here.
Mistake 1: Tensioning the line too high
Many set the line up at hip height or higher – that feels like a “proper” slackline. For getting started, though, it’s unnecessarily hard and off-putting, because the jump-off is farther and your head has more respect for it.
The fix: tension the line so low that under load it hangs roughly at knee to calf height – about 30 to 50 cm above the ground. That way you mount relaxed and dismount just as relaxed. You can always go higher once your standing is solid.
Mistake 2: Tensioning too tight or too loose
A rock-hard line barely wobbles sideways but hardly cushions either and reacts nervously to every tiny movement. A line that’s too loose sags and swings uncontrollably. Both make learning harder than necessary.
Find the middle: noticeably taut, but with a bit of give when you stand on it. A short distance of three to five meters between the anchor points is ideal at the start, because less band swings less. With a ratchet in the beginner set for stable hold you adjust the tension in seconds.
Mistake 3: Not using tree protectors
Tensioned directly around the trunk, the band presses into the bark and damages the tree – ecologically a no-go, and in many places not allowed either. The band also slips more easily without protection.
Always place wide tree protectors underneath, ideally from a trunk diameter that carries the weight. If you have no tree at all, that’s no obstacle: with a frame for a slackline entirely without a tree you can train on the lawn, in the garden or even indoors.
Mistake 4: Hard or uneven ground
Concrete, gravel or a root right under the line invite missteps and rob you of your looseness. You then jump off more hesitantly and clench up.
Choose soft, even ground – lawn or soft forest floor. Clear stones and hard edges out of the dismount area. With gear, watch for solid build quality; the DIN 79400 standard is a sensible orientation for the quality of slackline equipment.
Mistakes in technique
Once the setup is in place, it comes down to standing itself. Here a few habits decide whether you sway or settle.
Mistake 5: Looking at your feet
The classic: you stare down at your feet, because that’s where everything is happening, right? That’s exactly what robs you of your balance, because your sense of balance orients itself strongly to a fixed point in front of you.
Find yourself a calm fixed point at eye level – a tree, a post, a point on the horizon – and keep your gaze there. Your feet find their way on their own as soon as your head stays calm. This one change alone often makes the biggest difference.
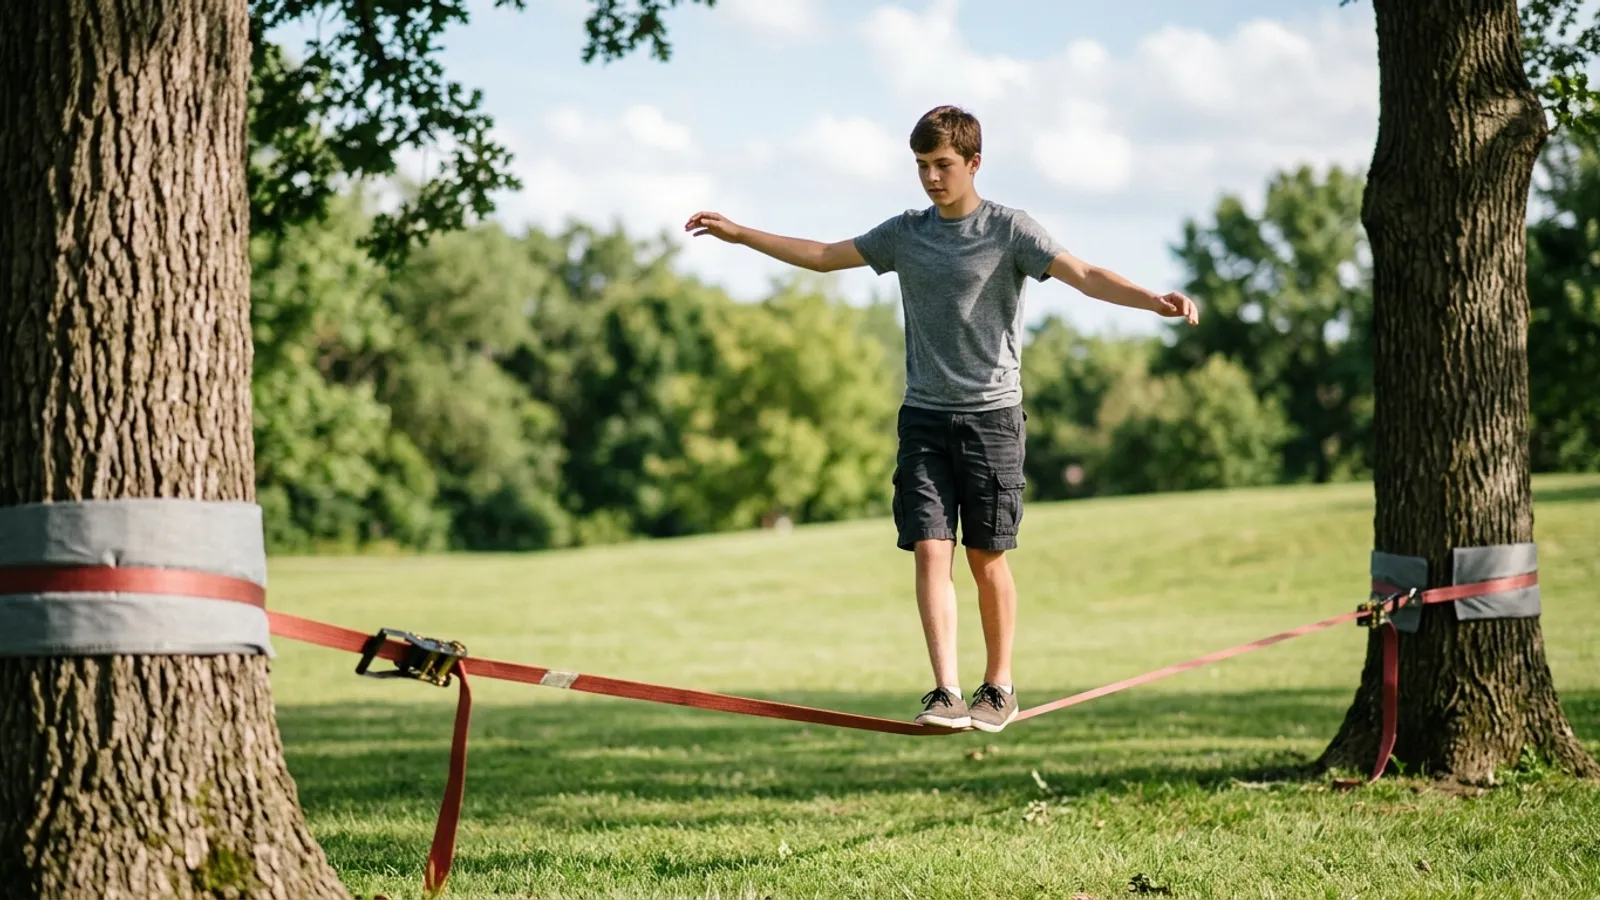
Mistake 6: Arms too low and body too tense
With hanging arms you lack fine control, and a stiff, clenched body can’t compensate. Beginners often press their shoulders up and hold their breath – that amplifies the shaking.
Lift your arms above shoulder height, slightly bent like a tightrope walker. They’re your balancing rudder and may actively work along. Bend your knees slightly, keep breathing consciously and let your hips stay loose – a soft leg dampens the swing much better than a locked one.
Mistake 7: Jumping off immediately instead of compensating
At the first wobble many jump off reflexively. Understandable, but this way you never train the holding – instead you practice giving up.
Give your body a second to counter-steer before you step off. The actual training for core and balance lies exactly in this compensating. Dismount in a controlled way when it’s really necessary, instead of hopping off in panic. Our article on improving balance shows you how to build up this counter-steering in a targeted way.
A little trick for the start: get help with one hand or a shoulder, or set the line within reach of a railing. A second point of contact takes away the uncertainty without doing the work for you.
Mistakes in practicing and sticking with it
The last two pitfalls happen away from the line – in your head and in your training plan. They cost the most motivation but are especially easy to fix.
Practicing too long and too tired
Slacklining is a concentration sport. Practice until your legs shake and your head is empty, and mistakes creep in and frustration grows. Long sessions in one go bring you less than regular short ones.
Better to practice 10 to 15 minutes at a time and then take a break. Three short sessions per week clearly beat a single long ordeal. Stop while it’s still fun – then you’ll be glad to come back.
No progression – always trying the same thing
Whoever just wants to “somehow stay standing” for weeks quickly loses motivation, because measurable progress is missing. Without small stage goals everything feels the same.
Build yourself a simple staircase: first mount with both legs and hold for three seconds, then balance on one leg, then the first step, then two. Each step is a success you may celebrate. You’ll find a structured step-by-step order in our setup guide.
Feel free to briefly note your mini-milestones – two seconds today, five next week. This visible progress is the best motivator there is. And it shows you that the early mistakes are long since history.
If you’re still putting your setup together, it’s worth a look at solid basics. You can browse in the Primeful shop at your leisure and choose the band, ratchet and protection to suit your space.
Frequently asked questions
Why do my legs shake so much?
That’s called muscle tremor and it’s completely normal at the start. Your small stabilizers in foot and leg are working so finely against each other for the first time and tire quickly. With every session the shaking gets less – bend your knees slightly and keep breathing calmly, that helps right away.
How low should I tension the slackline at the start?
So low that under your weight it hangs roughly at knee to calf height, about 30 to 50 cm above the ground. Lower is safer when dismounting and takes away your respect for it. You can earn more height once your standing is solid.
How long does it take until I can manage a few steps?
That’s very individual and depends on practice and prior experience with balance. Many stand for a few seconds after a few short sessions and take their first steps after some weeks. More important than a fixed date is that you practice regularly and briefly.
Do I absolutely need a tree to practice?
No. Two stable trees at the right distance are one option, but not a must. With a free-standing frame you train flexibly on the lawn, in the garden or indoors – ideal if there are no suitable trees nearby or you want to practice all year round.