You stand securely on the line and want more? This is exactly where the first slackline tricks begin: small moves that not only look cool but noticeably boost your balance, your body tension and your self-confidence. In this guide you go step by step from a solid stand to the turn, the sit-start and the surfer stance – without pressure, with clear cues and safely dosed. One thing first: tricks are not a race. Whoever practices calmly and in the right order learns faster and with less frustration.
Slackline tricks: where you start
The best first slackline tricks build directly on what you can already do: stand calmly. Before you try any move, you should have a few seconds of free standing in the bank – without wobbling, without your arms flailing in panic. If that works, you have the base for almost everything that follows.
Picture the order like a small staircase. First the stable stand, then the controlled sit-start as an entry from below, then the turn around your own axis, and finally the surfer stance crosswise to the line. Each step makes the next one easier.
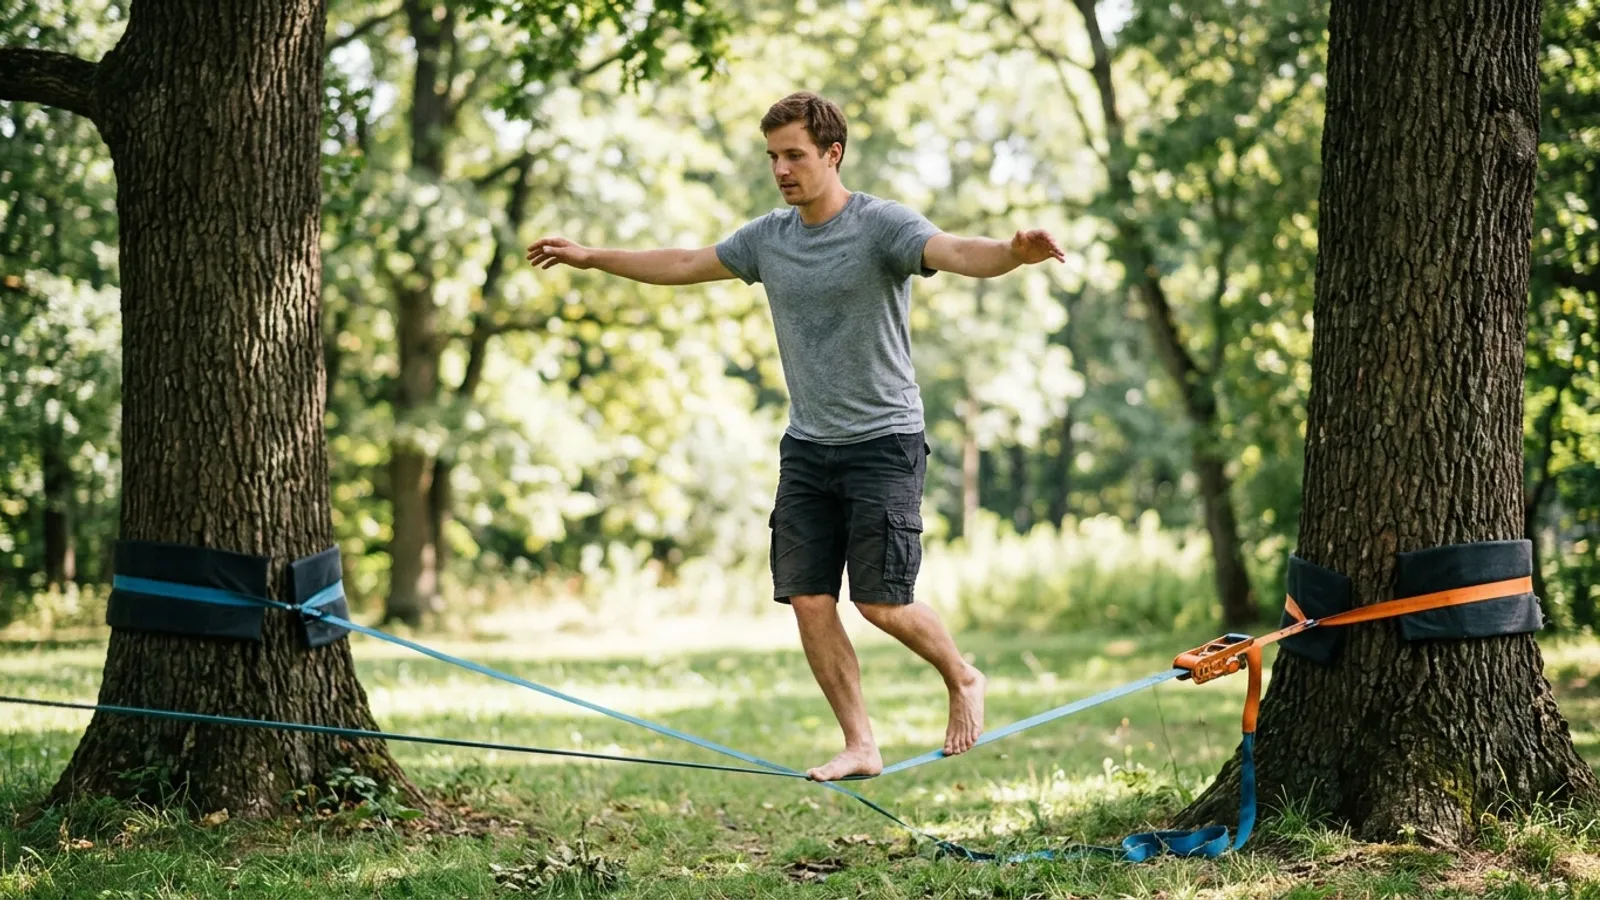
The environment matters. Set the line low, roughly knee to thigh height, and lay a soft surface under the whole stretch: lawn, grass or a mat. A low line plus a soft floor means every “exit” is simply a step to the side – not a fall you have to think about.
If you’re just starting out, solid gear is worth it. A well-thought-out set with a wide band and a good ratchet system makes the setup predictable and the line calmer. Take a look at a beginner set with everything you need – it takes a lot of early frustration off your plate.
These prerequisites help you
- Free stand: at least three to five seconds on one leg, without holding on.
- Loose hips and knees: a slightly bent standing leg cushions wobbles.
- Calm gaze: eyes on a fixed point at the end of the line, not on your feet.
- Patience: ten clean attempts beat thirty hectic ones.
A secure stand as your base
A stable stand is not a “trick”, but it’s the bench on which all moves run. If your stand wobbles the moment you even think about a turn, the order is the problem, not your talent. Solidify the base first – it saves you weeks.
The basic posture: standing leg slightly bent, foot lengthwise on the band, gaze forward. Your arms are up, around shoulder height, and work as a counterweight. Imagine you’re balancing not with your feet but with your pelvis and arms. The small corrections come from the hips.
Keep breathing consciously. Many beginners unconsciously hold their breath, and that’s exactly when the body goes stiff. A calm breath keeps you loose and responsive. Practice standing deliberately on both legs – most people have a clearly weaker side.
If you’re still unsure at this point, that’s completely fine. In our guide on improving balance you’ll find targeted exercises for the calm stand. Only once that’s solid do the first moves become real fun.
A small check before your first trick
Ask yourself honestly: can you stand calmly on one leg, briefly lift the other knee and set it back down without stepping off? Can you manage a controlled squat on the line? If so, you’re ready. If not, stay with the stand for a few more sessions – that’s not lost time but the foundation.
The first three tricks
Now let’s get concrete. These three moves are the classic first slackline tricks, because they build on each other and can be well secured with a low line. Practice each one until it feels calm before you move to the next.
Trick 1: The sit-start
The sit-start is the friendliest entry, because you don’t balance from above but work yourself up from below. Sit sideways on the band, roughly in the middle, and first find your calm while seated. Your hands may lightly support you at first.
Then you place one foot lengthwise on the band, shift your weight over it and press yourself up into a stand in a controlled way. The key is tempo: don’t jump up, rise slowly so the line doesn’t start to swing. If you manage the stand-up, you’ve trained your core tension at the same time.
Form tip: when pressing up, point your gaze forward immediately, not at your foot. The head leads the movement.
Trick 2: The turn (180°)
The turn is the first “real” move and a big motivation boost. Stand calmly, both arms up. Then turn in slowly over your shoulder by taking first your head, then your shoulders and lastly your feet with you. Your feet roll over the band one after the other.
Do it in small stages first: a quarter turn, briefly stabilize, continue. Only once 90 degrees is secure do you go for the full 180-degree turn. A clean slackline turn rarely succeeds on the first attempt – that’s normal and part of it.
Form tip: keep your hips and knees soft. Turn stiffly and you lose your center. Turn from your upper body, the feet follow.
Trick 3: The surfer stance
In the surfer stance you stand not lengthwise but crosswise to the line – like on a surfboard. It feels unfamiliar at first because the line now swings sideways beneath you. That’s exactly what makes the move strong training for the ankles and lateral stability.
Place both feet crosswise on the band, hip-width apart, knees clearly bent, weight low. Find your calm in the crouch before you straighten up. The low center of gravity is your friend: the lower and looser you are, the more easily you catch the sideways swaying.
Form tip: arms wide open, almost like wings. They balance out the sideways swing that you don’t even know lengthwise.
And the drop-knee?
Once the three above are solid, the drop-knee is a nice next step: from standing you lower one knee toward the band in a controlled way and come back up. It demands clearly more leg strength and control – so really only tackle it once the stand, sit-start and turn work reliably.
Stick with it and progress safely
Tricks are learned better in short, frequent sessions than in long marathon ones. Ten to fifteen minutes a few times per week do more than two hours in one go, because your nervous system stores the movements through repetition. When tired, you wobble more and rob yourself of the successes.
Stick to the order and skip nothing. Whoever forces the surfer stance before the free stand is solid mostly collects frustration. Celebrate small steps of progress – even a clean quarter turn is a real move. And if a day just doesn’t go well, that’s not a setback but part of the process.
Mind your surface and the height. A low setup and a soft floor remain your most important safety rules, especially when practicing new moves. Always dismount in a controlled way instead of letting yourself drop, and rather practice the stand and control a bit longer before you set the line higher.
No tree or post nearby? Then you don’t have to give up your garden. With a stable slackline frame for indoors and out you can train all year round in the living room or on the terrace too – ideal if you want to stick with your first tricks. With gear, it’s worth looking at a quality orientation like the DIN 79400 standard; it gives you a reference point for solid slackline equipment.
If you want to deepen your fundamentals alongside the tricks – core, balance and a sensible training structure – take a look at our Slackline Fitness Guide. Tricks and fitness go hand in hand: the stronger your center, the cleaner your moves.
Fancy more equipment, accessories or the right set for your level? Then you can browse in the Primeful shop at your leisure and find what suits your next trick step.
Frequently asked questions
Which trick is the easiest to start with?
The sit-start, because you work yourself up from below instead of balancing from above. You find your calm while seated first and then stand up in a controlled way. That gives you an early sense of success and trains your core tension at the same time.
How long does it take until I can do my first slackline tricks?
That’s very individual and depends on how secure your stand already is. Many manage a sit-start after a few sessions, while a clean turn often takes a few weeks of regular practice. Short, frequent sessions help more than rare long ones.
How do I set the line correctly for practicing tricks?
Low, roughly knee to thigh height, and with a soft surface under the whole stretch. A fairly tight line swings less and makes first moves more predictable. That way every exit simply becomes a step to the side.
Do I need prior knowledge or special fitness?
No, a healthy everyday body is plenty. More important than strength is a calm, free stand as your base. You build that up with a bit of patience before you take on the turn, surfer stance and the like.