Improve balance with slackline: the basics
If you want to improve balance with slackline, it’s not about more strength but about better control. Balance on the line is a skill your body learns – through repetition, clean feedback and small, targeted stimuli. That’s exactly what we’ll look at here.
The line wobbles because your body is constantly readjusting. That’s not a flaw but the core of the training: your sense of balance, your eyes and your deep core muscles work together and correct things in milliseconds. The more often you practice this, the finer and calmer those corrections become.
Having the right expectation matters. At first your standing leg shakes and you fall after a few seconds – that’s normal and no sign of missing talent. Your nervous system is busy gathering data. Standing more steadily comes with the practice sessions, not overnight.
The standing foot as your foundation
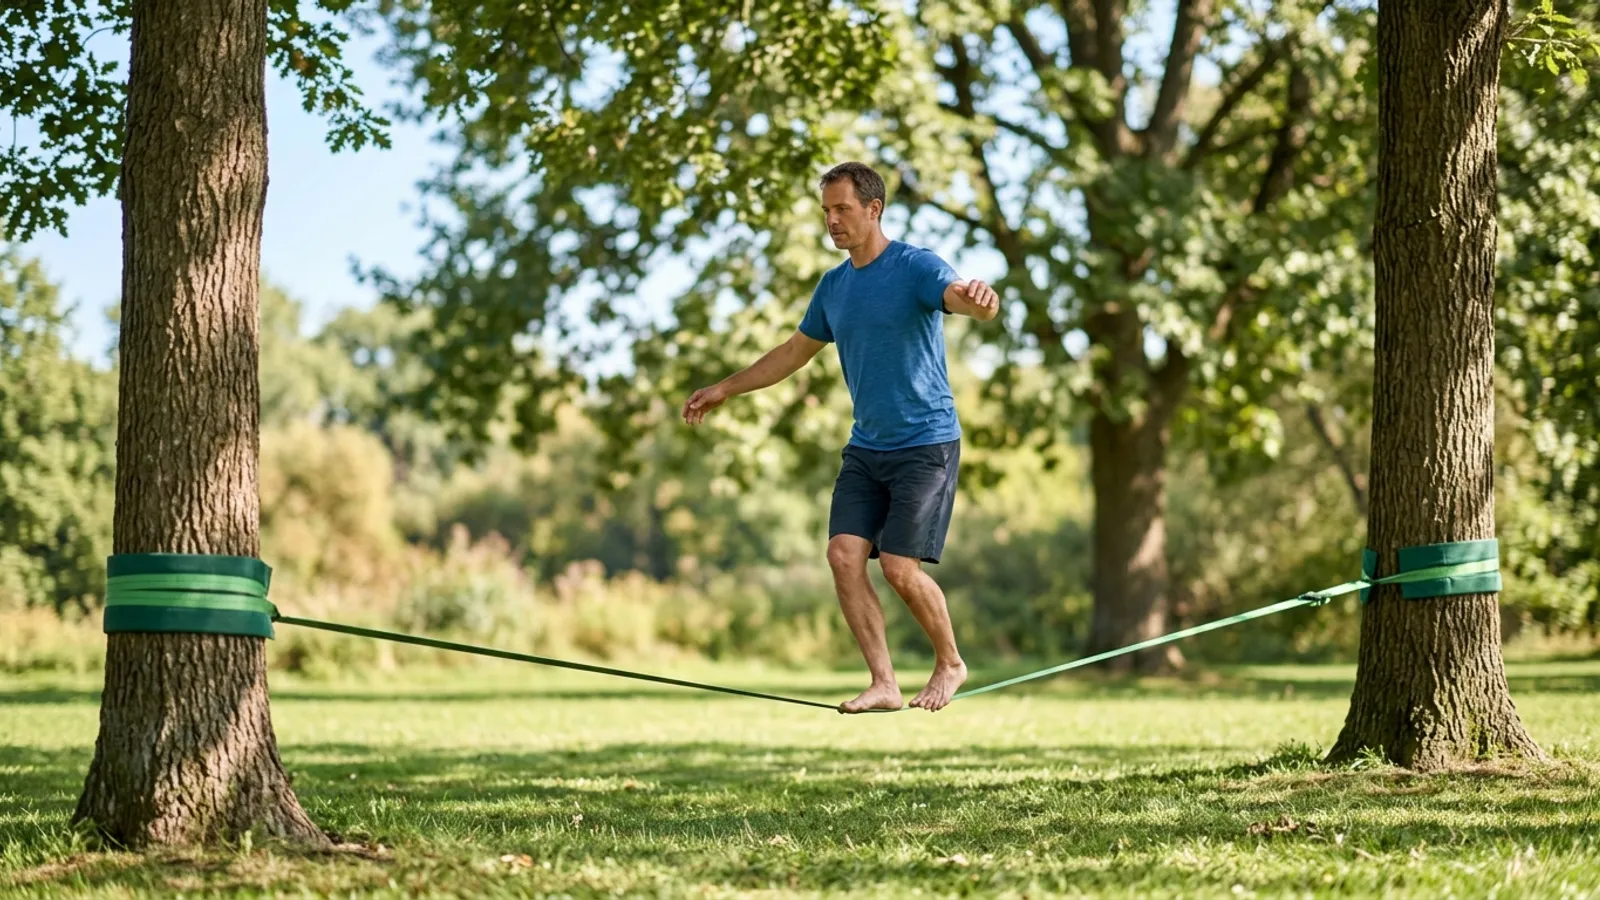
Step onto the line barefoot or in thin shoes, with the foot pointing lengthwise along the band. That gives you the largest contact surface and lets you feel how the line works beneath you. Actively grip with your toes, as if you were gently grabbing the ground.
Bend the standing leg slightly – a locked knee blocks you. A soft knee absorbs the swings and gives you room to counter-steer. Imagine you’re sitting down a tiny bit rather than standing stiffly.
A calm, not-too-tight line helps enormously at the start. On a stable setup – such as a frame with defined tension – you’ll find reliable conditions instead of guessing anew each time. You’ll find more on setup and gear in the Slackline Fitness Guide.
Gaze, breathing and body tension
Three things decide how calmly you stand: where you look, how you breathe and how you distribute your tension. You can control all three consciously – and this is exactly where you make the fastest progress.
Fix your gaze instead of looking at your feet
Your most common reflex is to look down at the line. That destabilizes you, because your sense of balance then gets contradictory signals. Instead, find a fixed point at eye level – a tree, a post, a mark on the wall.
Keep that point calmly in view, even when your body sways. The fixed gaze gives your system a stable reference to align with. You’ll notice it: as soon as your eyes settle, your body settles too.
Breathing as an anchor
Under tension many people hold their breath – and become stiff and tippy as a result. Keep breathing consciously, calmly and evenly into your belly. A long exhale lowers your baseline tension and makes your corrections smoother.
A simple trick: quietly count your breaths while you stand. That distracts you from the fear of falling and keeps your breathing flowing.
Dose your body tension correctly
You need tension in your core, but no clenching. Too loose, and you buckle; too tight, and you lose the ability to react finely. The goal is an alert baseline tension – belly slightly active, chest open, shoulders low.
Your arms are your balancing tool. Hold them around shoulder height, loosely bent, like a tightrope walker. Counter-steering happens mainly through the hips and arms, not through frantic flailing with the standing foot.
Drills for standing longer
Now let’s get concrete. These drills build on each other and all aim at the same thing: to stand longer on a slackline without clenching. Pick two or three per session, short and focused rather than long and exhausted.
Drill 1: One-leg stand with support
Place one leg on the line, keep the other on the ground for safety, or hold on with one hand (a partner or a pole). Slowly shift more weight onto the line leg until you briefly stand free. Hold for two or three seconds, then back down.
Repeat this calmly and without jerking. Here you specifically train the standing leg and your awareness of when your center of gravity sits over the foot. This exercise trains your balance more effectively than long, frustrated wobbling.
Drill 2: Free stand against the clock
Try to stand without support and count the seconds. Note your best time per session – it makes progress visible and motivates you. Build up from a few seconds toward ten, then twenty.
As soon as you fall, get straight back on. The number of mounts counts more than a single long attempt. Many short contacts with the line give your nervous system more learning data.
Drill 3: Weight from leg to leg
Stand with both feet one behind the other on the line and slowly shift your weight from front to back and back again. This drill trains lateral and lengthwise control at the same time. Stay in a soft knee and breathe calmly.
Drill 4: Controlled gaze shifts
Once the free stand is solid, make it harder on purpose. Look briefly left, then right, without falling – always returning to your fixed point. This makes your balance more robust against distraction and prepares you for walking, where your gaze travels forward.
If you notice you keep making the same mistakes, it’s worth a look at common beginner mistakes – often it’s small details in posture or setup.
How often should you train?
Three to four short sessions per week do more than one long one on the weekend. Balance is coordination, and the body learns coordination through frequent, fresh stimuli. Twenty focused minutes are plenty.
Plan breaks deliberately as soon as your concentration drops. When you’re tired, you only practice mistakes. Better to stop while it’s still going well – then you’ll look forward to the next time.
If you want to practice regularly at home, a solid set is a good idea. A beginner set with ratchet and tree protectors gives you reliable tension, and you can rely on gear that follows the DIN 79400 standard while you practice.
From standing to secure walking
At its core, walking is a chain of short one-leg stands. Only once you can stand calmly on one leg for a few seconds is the first step worth taking. With that base in place, walking becomes surprisingly logical.
The first step
Shift your weight fully onto the front leg, find your calm briefly, and place the rear leg directly in front of it on the line. Set the foot down centered and controlled, not hastily. Between steps you may and should pause briefly and rebalance.
At the start, take just one step, then two. Quality beats distance. One clean, controlled step gets you further than three wobbly ones.
Gaze and rhythm while walking
When walking, the fixed point moves forward with you – look where you want to go, not at your feet. Find a calm rhythm of step, brief stabilization, next step. The arms stay up and keep balancing.
Breathe in time with your steps. That keeps you from holding your breath again during the movement and getting stiff.
When it wobbles
If the line swings hard, don’t freeze – work with the movement. Let your pelvis swing loosely and counter with your arms instead of clenching the standing leg. Often the line calms down on its own if you keep breathing steadily.
If the line swings too much, a controlled jump off to the side is better than a clenched fall. Practice dismounting on purpose, then you’ll lose your fear of falling – and that very looseness makes you more stable.
If you don’t have the right tree spacing or a garden, that won’t stop you: with a free-standing slackline frame for indoors and out you can train all year long at reliable tension. You can browse more accessories and sets at your leisure in the Primeful shop.
Frequently asked questions
How long does it take until I can stand free?
That’s very individual. Many stand free for a few seconds after just a few sessions, while a calm stand over ten seconds often takes a few weeks of regular practice. Frequent short sessions speed up progress considerably.
Why does my standing leg shake so much?
The shaking happens because many small muscles fine-tune at the same time – that’s tiring and completely normal at the start. It eases off as soon as your coordination improves and the corrections run more economically. A soft knee and calm breathing reduce it noticeably.
Should I learn to stand or to walk first?
Stand first, then walk. Secure walking builds directly on the stable one-leg stand, because every step is a short one-leg stand. Skip the standing and you usually only practice walking wobbly and frustrated.
Does a tighter or looser line help when improving balance?
For getting started, a fairly tight, calm line is more pleasant because it swings less and reacts more reliably. A looser line demands more control and makes sense once you get more confident. A stable setup with defined tension gives you the best learning conditions.