You’ve set up a line, you’re standing on it, and you wobble like a penguin on ice? That’s exactly what this slackline training plan is for. Eight weeks, two to three short sessions per week, clear weekly goals – from your first reasonably calm stand to walking the whole line with confidence. No drill for pros, just a realistic path for everyday adults.
One thing up front: this is a learning plan focused on walking. If you’d rather work on strength, core and general fitness, the Slackline Fitness Guide is the perfect complement to this plan – the two combine well.
Slackline training plan: how it’s structured
The plan splits eight weeks into three phases: first find your stand, then take your first steps, then walk with confidence. Each phase builds on the one before. You don’t skip a step, however tempting it is.
Plan two to three sessions of 15 to 25 minutes per week. More isn’t better – your nervous system learns balance better in short, focused blocks than in one long session where you eventually just keep falling off in frustration.
Keep the line ankle- to shin-high at first and not too long (about three to four meters) so it sways less. A short, taut line is more forgiving and gives you quicker wins.
Feel free to keep a short training journal – one sentence per session is enough: how many seconds you stayed standing, how many steps you managed, how it felt. Progress on the line is hard to feel day to day, but over two weeks it becomes clearly visible. That keeps you going when a single day feels like a slog.
What you need
A stable set and safe ground are enough to get started. Look for a ratchet with a reliable lock and a band 50 mm wide – it sits more steadily than a narrow one. As a guide for tested equipment, the DIN 79400 standard can help, but it’s not a must.
If you want to get going, a complete beginner set with a ratchet and tree protectors is the simplest solution – everything included, set up in ten minutes.
How to read the weekly goals
| Phase | Weeks | Goal |
|---|---|---|
| Stand | 1–2 | stand freely, 10–20 seconds |
| Steps | 3–5 | several steps in a row |
| Walking | 6–8 | walk the whole line |
The time figures are rough guides, not guarantees. Some people stand after three days, others need three weeks – both are completely normal and say nothing about your talent.
Weeks 1–2: finding your stand
The first two weeks are all about standing. Your body is only just learning to compensate for the line’s constant micro-movements. It feels chaotic at first and then settles down surprisingly fast.
Warm up briefly: circle your ankles, do a few squats, loosen your calves. Always step onto the band centrally with the same foot, not sideways at the edge.
Drills for standing
- Mounting with help: Hold onto a shoulder, a pole or a second tensioned cord. Put one leg on the line, find the pressure point, then add the second.
- Single-leg stand: Stand on one leg as long as you can, eyes straight ahead on a fixed point at the end of the line – not on your feet. Arms relaxed above shoulder height, knees slightly bent.
- Switching stand: As soon as one leg holds for ten seconds, switch your standing leg. Practice both sides equally often.
The most important tip of this phase: look forward, not down. Your balance orients itself to the horizon, not to your toes. Find a fixed point at eye level and keep your eyes on it throughout the exercise.
By the way, you stand more stably barefoot or in thin socks than in thick shoes – the sole of your foot feels the band directly and can react more finely. Place your foot lengthwise along the line, not across, so more of your sole rests on it and you tip to the side less.
Weekly goal 1–2
| Week | Goal | Note |
|---|---|---|
| 1 | mount with help, hold 3–5 sec. | many short attempts |
| 2 | stand freely, 10–20 sec. | practice both legs |
If your leg trembles: completely normal. That’s your muscle learning to fine-tune its effort. Take a break as soon as your concentration drops – you train balance with your head, not with grim determination.
Weeks 3–5: first steps
Now movement comes into play. You can stand by now, so you shift your weight and place the first foot forward. The classic mistake: steps that are too big. Make them tiny.
Before each step, fully load your standing leg, lift the other foot only a few centimeters and set it back down close in front. Arms stay up and work actively – they’re your balancing system.
Drills for the first steps
- Weight shift: In a two-leg stand, slowly rock your weight from front to back and side to side without falling off. This trains the feel for counterbalancing.
- One step, then hold: Take a single step, stabilize the new stand, hold briefly. Only when you’re standing calmly comes the next one.
- Start from the end: Always mount at the tensioned end, where the line sways least. It gets harder toward the middle – that’s intended.
Keep breathing consciously. Many people hold their breath during a step and tense up because of it. Calm exhaling as you set your foot forward helps more than you’d think.
If you tip sideways after every step at first, that’s not a setback – it just shows that you now have to counterbalance more actively in the transition than in plain standing. Keep your hips loose and work with small movements from the ankle, not with frantic swings of the arms. The calmer you stay, the faster the line finds its point.
Weekly goal 3–5
| Week | Goal |
|---|---|
| 3 | stand securely + shift weight |
| 4 | 1–3 steps with holds in between |
| 5 | 3–5 steps in a row |
No tree or garden? Then this is exactly the moment to keep going indoors instead of taking a break. A freestanding slackline frame for indoors without trees makes the plan weather- and location-independent – ideal for not interrupting the step phase.
If your steps work but look messy, a focused technique check pays off: the post on improving your balance on purpose shows how to turn wobbling into controlled stability.
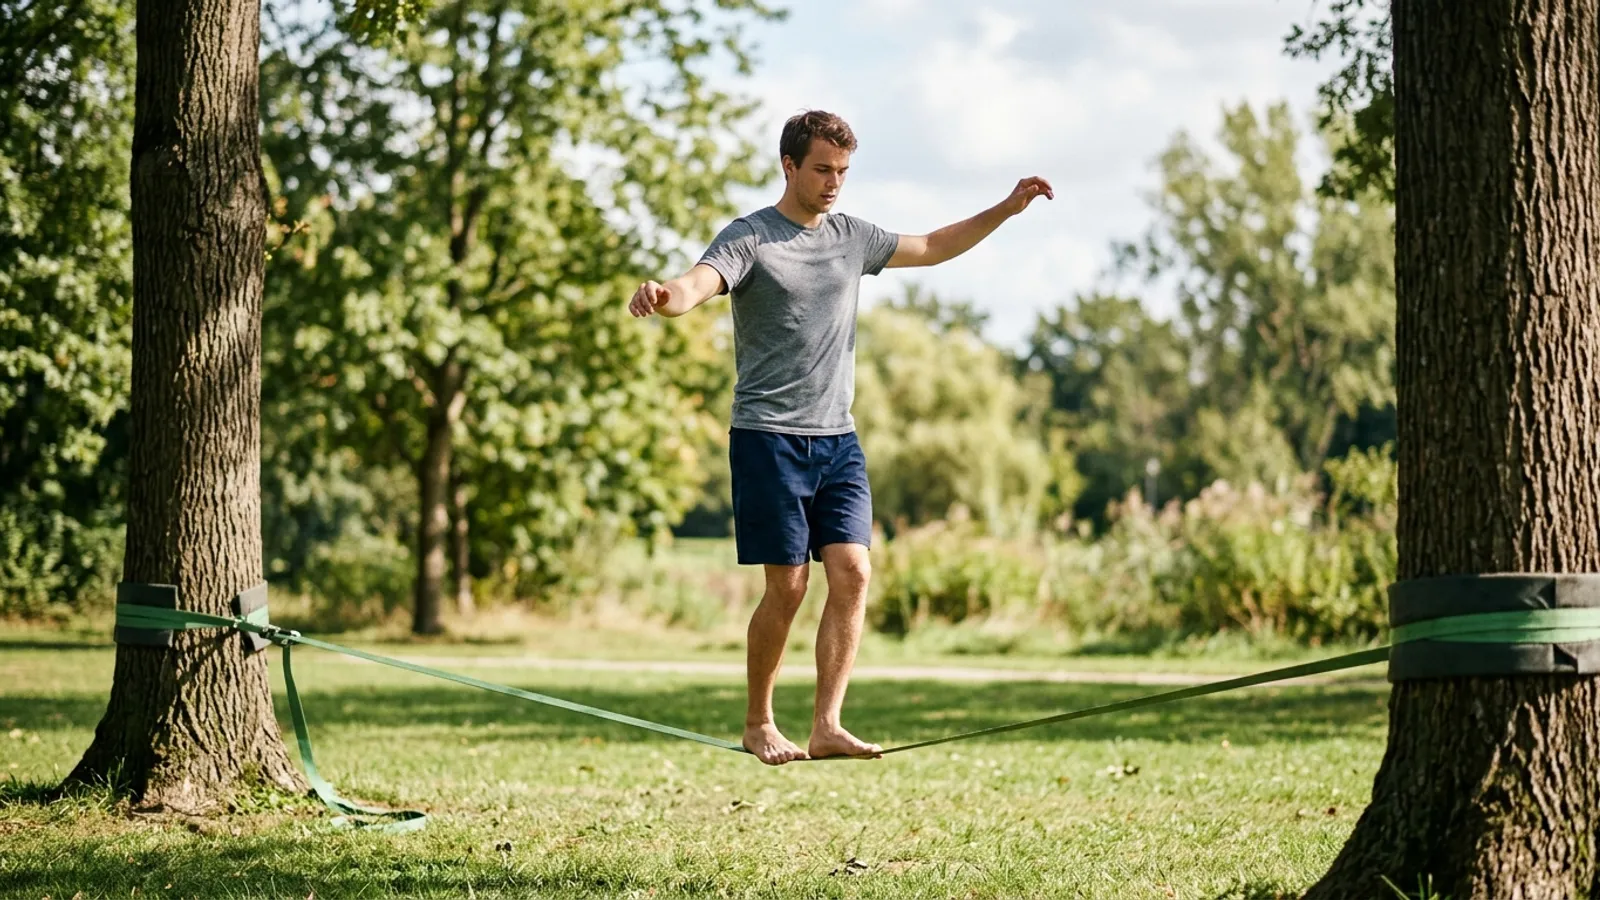
Weeks 6–8: walking with confidence
In the final phase you connect the individual steps into fluid walking. The goal isn’t speed but control: better to walk the whole line slowly and calmly than to rush a few meters.
The key is your gaze and your rhythm. Look ahead to the end of the line, not at your next step, and find an even cadence. As soon as you start thinking about each step individually, you fall out of the flow.
Drills for walking
- More meters in a row: Set yourself a small “more” as a goal each session – two more steps than last time. Small increases keep you going.
- Turning around: When you reach the end, practice turning in place and walk back. That’s demanding and a good sign of real control.
- Adding difficulty: Once walking is solid, make the line a bit longer or minimally higher. That keeps training challenging without needing a new exercise.
Plan deliberate rest days. Balance is nervous-system training, and that consolidates during the breaks. Two to three sessions a week with free days in between achieve more than daily practice to the point of exhaustion.
A typical phenomenon in this phase: on some days everything works by itself, the next day you wobble more again. That’s part of it and not a sign that you’re doing something wrong. Daily form, fatigue and concentration fluctuate – over the weeks the trend still points upward. Better to cut a session short when your concentration is gone than to string together bad attempts.
Weekly goal 6–8
| Week | Goal |
|---|---|
| 6 | 5–8 steps fluidly |
| 7 | walk across half the line |
| 8 | walk the whole line |
If you can’t quite make it across after eight weeks: no big deal. The plan is a framework, not a promise. Repeat the phase where you’re stuck and give your body the time it needs.
If you’re looking for the next step – longer lines, new material or accessories – you’ll find the right equipment to browse the Primeful shop and expand your training.
Frequently Asked Questions
How often per week should I train?
Two to three sessions of 15 to 25 minutes are plenty. Your body learns balance better in short, focused blocks than in long sessions, and the rest days in between are part of the progress.
Will I really manage this in 8 weeks?
Many beginners walk the line confidently within this framework, but it’s no guarantee. Some need longer, others are faster – both are normal. See the weekly goals as orientation, not as a test.
How high and how long should the line be at first?
Start ankle- to shin-high and short, about three to four meters. A short, taut line sways less and gives you a calm feeling sooner. You increase length and height only in the final weeks.
What if I get stuck in one phase?
Just stay in that phase instead of forcing the next one. Repeat the relevant drills, mind your gaze and breathing, and allow yourself breaks. Progress on the line rarely runs evenly.